3D Animation: Make Some Noise!
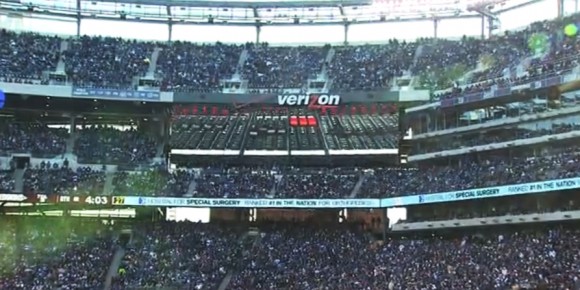
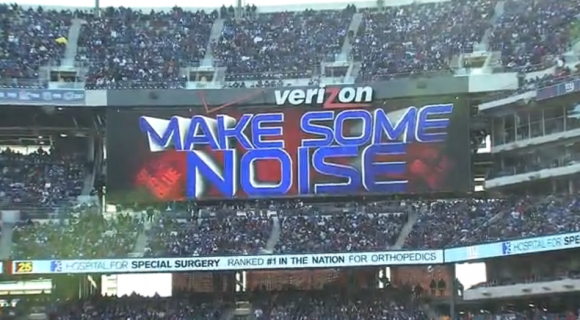
PROJECT: “MAKE SOME NOISE” Giants stadium scoreboard prompt used during Giants home games at MetLife Stadium on the 4 large video boards.
One of Ferro’s contractual responsibilities during the NFL season is to support the Giants “in– game show”. This includes videos and graphics played during time outs throughout the game. Some of those graphics include stadium prompts. These are used to motivate or direct the crowd to an action. This particularprompt was to have the crowd cheer or “Make Some Noise”. The prompt was to be based on the older version prompt, which was a simulation of a group of audiometers increasing with the level of the crowd noise. A few other design considerations were the project’s color scheme, which had to incorporate the blue and red of the Giants’ team colors and the enormous size of the stadium’s boards.

To ensure his design would scale the an enormous stadium screens of 28 ft. X 113ft. and accommodate the unique video formatting framing of those boards, Swen built a custom playback template in Cinema. Swen said his biggest concern was working at such a huge scale, “When your working with a monitor that is 23 inches X 14 inches you have to constantly remember that a 2” text character on your desktop monitor will be 2 ft on the stadium boards. That’s an insane ratio to be working in.
“When I think of audio meters I always think of the meters on an audio sound board /mixing board (see BEHIND THE WIZARDS CURTAIN Note: 1)
Like the ones found in music recording studios or at concerts.” States Ferro senior graphic designer and animator, Matt “Swen” Swensen. Swen started the project by researching different mixing consoles. He was looking for ones that had the “coolest style and looked realistic”. Swen ended up on the Turbo Squid site. There he found a model that he thought would work. While working on the design one of Ferro’s audio engineers saw his project file and mentioned that the model he chose was not a realistic console used in a stadium audio suite. Swen sarcastically asked himself, “Is it of value to have a diverse group of experts around all the time or is it a curse, because I’m sure the client would have never noticed?” In the world of Ferro Production, “Right is always right even if no one will ever notice.”

Swen finally landed on realistic console that had the perfect look and coincidentally the same color scheme as the Giants. Fortunately, the image was also a high-resolution large-scale overhead view, perfect for modeling.
CONCEPT:
Swen’s concept for the animation would have the faders on the console moving up while the bar graph VU meters would increase thereby simulating the crowd “getting loud”. To achieve an exciting animation he would simulate several different camera angles of the console and moving faders revealing the text “GET LOUD”.
“My first attempt at molding and animating the faders was a bust”, Swen admits. “What I attempted to do was bring in the entire flat image into Cinema and then animate new faders over the ones from the original image. After my first test I realized that when the faders animated / moved from their original position, it relieved the static faders from the original image. “ The genius of a genius is knowing there are several ways to achieve your goal.
Swen continues, “This was a trap I unintentionally set for myself. Usually, rushing through a project causes you to jump passed steps in your normal workflow, which always means more rework in the end.” That was exactly the case with this attempt. After abandoning his initial approach and rethinking his attack plan, he nailed it.
RESTART
STEP ONE: Prepare console for animated faders
Knowing that in the final animation he wanted the channel faders (see BEHIND THE WIZARDS CURTAIN Note: 2) to be moving, Swen had to find a way to animate the faders over the still image of the console. Swen recalls, “In order to move the faders the first thing I needed to do was separate them from the still model”. To achieve this he imported the 2D console image into Photoshop and removed each fader. This left him with a flat image of the console with no channel faders.
STEP TWO: Flat image to 3D model
He then imported the new faderless console image into Cinema (this is the program used for 3D modeling) and transformed the 2D console into a 3D model. (For details on this process please refer to Swen design blog) http://www.ferroproductions.com/reel-ferro-open-breakdown/
STEP THREE: Adding animated faders
“ Animating the faders without running into the same problem I approached things a little differently” Swen states. To replicate the faders he first had to make new faders. To do this he selected one fader from the original image, the one furthest to the left, and then applied the MoGraph > Cloner (see BEHIND THE WIZARDS CURTAIN Note: 3) to that fader. He tweaked the setting to CLONE (see BEHIND THE WIZARDS CURTAIN Note: 4) this one fader 11 times along the X– axis (see BEHIND THE WIZARDS CURTAIN Note: 5). In doing this he knew he could now control the positioning of each fader in relation to the console’s front panel and each adjacent fader. This would give him a perfect replication of the original image and still allow fader movement. He now had a perfect 3D model of the console with faders that he could determine their movement.
STEP FOUR: Camera angles and edits
“From the beginning I knew they wanted a highly stylized final piece.” Swen reveals. I knew I’d need several simulated camera angles timed with the movement of the console and meters.” He set camera one positioned at the back of the console angled to reveal faders moving towards camera. The second camera set on the same plan as the faders looking up to the VU meters.
STEP FIVE: Animating the faders
There are several key stages of animating the faders. The first was to place all faders to zero on the console channel image. Next he grouped (see BEHIND THE WIZARDS CURTAIN Note: 6) all the faders together. Swen shared a key design trick, “Since I had created the faders as a separate objects I was able to apply something called a RANDOM EFFECTOR (see BEHIND THE WIZARDS CURTAIN Note: 7), to all the faders on the Y– axis (see BEHIND THE WIZARDS CURTAIN Note: 8). This allowed me to simulate the faders moving up and down without having to adjust each fader with dozens of Key Frames.” (see BEHIND THE WIZARDS CURTAIN Note: 9) This approach not only made the process easier to produce, it saved hours of tedious time, placing and adjusting each fader’s key frames to simulate movement.
STEP SIX: Faders timing
Using the Random Effector, he set a single fader’s key frame at the zero position on the console’s image. Then he set the next key frame at the final “full up” console position. Between those to set points he allowed the Random Effect to establish the fader’s position and movement between those points. These settings were applied across 11 fader channels. The Randomizer will select and set key frames based on the SEED. (see BEHIND THE WIZARDS CURTAIN Note: 10) (The algorithm that decides the randomization of the key frames)
STEP SEVEN: Building and Animating Audio Bar Graph
The Bar Graphs and Bar Graph animation were all done in After Effects (see BEHIND THE WIZARDS CURTAIN Note: 11). Making it sound as routine as breathing, Swen explains, “I start with one rounded rectangle. Then filled the image with the color blue and multiplied that image 12 times in a vertical stack. From there I duplicate that stack 5 times horizontally and equally space each stack. Done!” Each blue bar of each stack can be turned on, off or partially on giving the effect of volume getting louder. The client and their knowledge of how the crowd reacts to board prompts determined the timing of the graph’s simulation.
STEP EIGHT: Camera Animation and final edit
“The cornerstone of every awesome animation is the placement of cameras and the moves applied to those cameras”, explains Swen. For this project Swen chose to use two cameras. Camera 1 was positioned at the edge of the console just below the faders. Camera 2 was an overhead close– up of a selected group of faders. Camera 1 movement went from its start position on the edge of the console, then pulls out wide revealing the entire board and the moving faders, pauses for a second and then pushes forward over the faders across the console up to a text graphic saying, “MAKE SOME NOISE”. “ From here I just quickly alternated between widening out to reveal the console with meters jumping and then pushing back to the text graphic. I used camera 2’s close up of the faders as a split screen simulation. I also threw in some spinning speakers to jazz up the pull-outs.” Swen explained.

Mixer final product
BEHIND THE WIZARD’S CURTAIN:
NOTE 1: The unit that all audio signals plug into and are “mixed” together for a balanced blend of a single sound source.
NOTE 2: A device found on all sound mixers used to control the audio level from one sound source. i.e. volume control.
NOTE 3: Mograp
NOTE 4: When applied to a Cinema image this feature will reproduce the selected image exactly with all parameters and specs included in the reproduction. The user can select how many clones will be reproduced.
NOTE 5: The location of a 3D modeled image are referred to by 3 axis X,Y,Z. X is used to locate horizontal position. Y is used to identify the Vertical position and Z locates depth.
NOTE 6: In a multi-imaged graphic design this technique allows the artist to combine several individual graphic elements to become one element. This is very helpful in moving or effecting several elements with one move.
NOTE 7: Adding this effect to a MoGraph allows the computer to determine a random pattern of motion for the selected object. The designer must preset the path the object will travel.
NOTE 8: See note 5.
NOTE 9: These are points placed on any time line to denote an action will take place at that point. The action will be determined by the designer.
NOTE 10: This function is referred to by numbers. The numbers select an algorithm that sets a predefined “random” movement.
NOTE 11: A 2D animation program.


