The Trooper
By Joe Scacciaferro
Original Design spec:
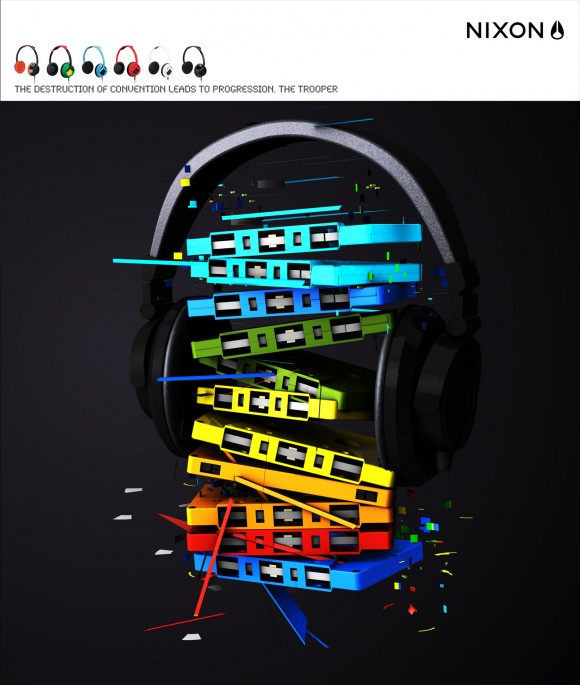
The client needed a print and static web AD for their new headphones that were offered in multiple florescent colors. They wanted the ad concept to include the headphones, audio cassette and florescent colors.
Execution Begins:
They began by developing the look and style of the images called out in the Original Design Spec (see above). At this point Swen decided to start the design with the audio cassette. He began with a 3D model rather than modify an existing image or pic. 3D imported the model as “spline” frame (see BEHIND THE WIZARDS CURTAIN Note: 1)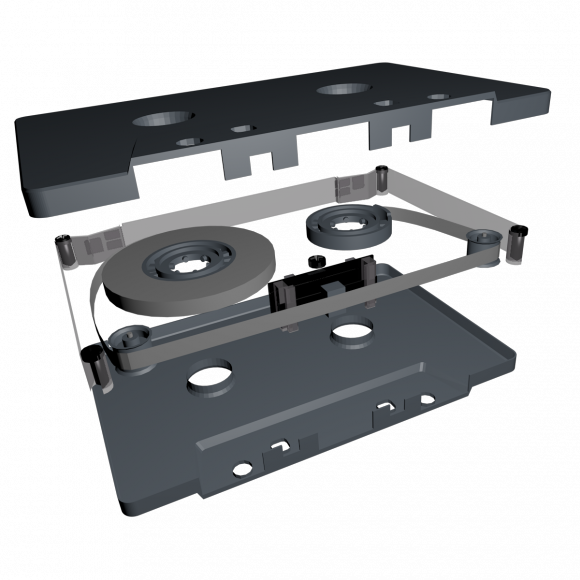
The headphone element came from a CAD drawing used for the actual product development. (see BEHIND THE WIZARDS CURTAIN Note: 2) After bringing the cassette model and headphones to life, they began experimenting with several combinations of elements. The client and Swen finally landed on the concept of an exploding cassette with music and sound elements busting through the walls of the cassette. Although, this exact concept could not be developed to the client’s approval it did lay the foundation for the ad in its accepted and present form. Swen recalls, “After several tries I couldn’t get the look real enough so instead we went with a stack of cassettes that were falling apart.”
Swen duplicated the cassette model over and over; changing the florescent color and randomly stacking the cassettes. After those elements felt right he added an “explosion” effect that created the particles / cassette pieces blowing out from the stack. (see BEHIND THE WIZARDS CURTAIN Note: 3) From there the headphones were laid over the cassette stack.
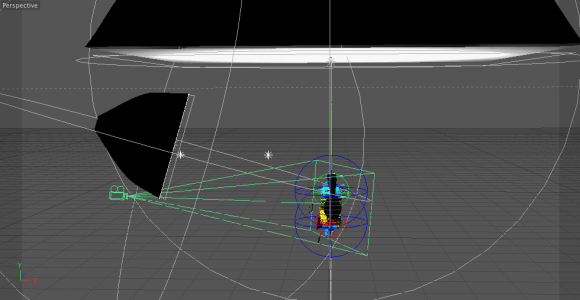
The final touch, as always for Swen, is lighting. Swen explains, “Lighting in 3D is the same as in real life. The light spray, wash, direction and intensity all come from their placement and fixture type just like in reality. Its crazy how cool they made these lights; even the diffusement used on the lights are similar to the lights found on most film and video sets.” Here Swen used one harsh light coming from upper left. (his “key” light).
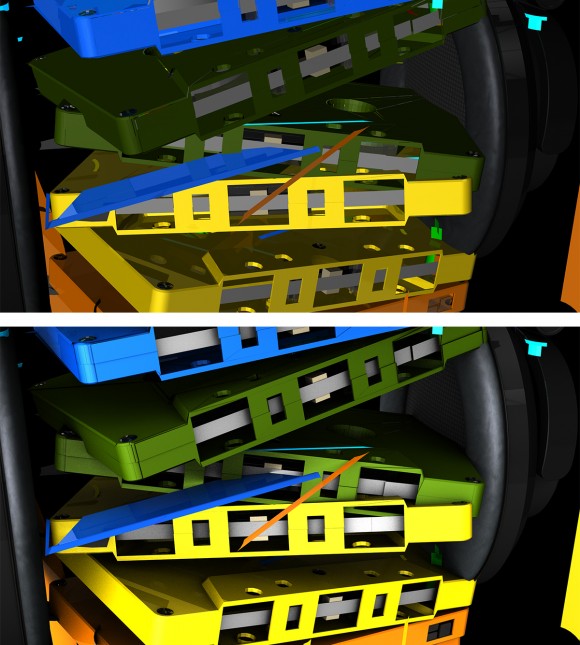
There is another fixture on bottom left place far from the cassette stack and finally a small fill and a backlight. Where 3D leaves reality is on the actual cassette cases. Each cassette had a “luminance tag” on them.(see BEHIND THE WIZARDS CURTAIN Note: 4)zWithout the tag the colors would be affected and react as they would in the “real” world. With the tag the color will not react to the external lights. Shading is generated by “ambient inclusion”. (see BEHIND THE WIZARDS CURTAIN Note: 5)This is an effect is applied to the entire scene and creates all the shadowing details based on light placement. This effect always extends the render and should be used only as needed. In this case it worth it.Designers final notes:“This particular concept evolved rather then having a defined visual from the outset. This was a perfect example of concept following execution realities.”
BEHIND THE WIZARD’S CURTAIN:
NOTE 1: Purchased a 3D model from TurboSquid.com for 60 bucks. Imported the model into Cinema 4D as a *spline frame. The model came as a “transparent” cassette exposing all the inner workings of the cassette. Removed the inner workings of the cassette Model. Having all those parts visual made the model to complex for this concept. Cinema being so cool, will calculate all images or parts of an image then add shadows and hightligts on every piece of the model. This is done in an effort to ensure the final render will look as real as possible. The more complex the image the longer the render time. For the purpose of this add that feature was not necessary and would add a considerable amount of unnecessary time to the final time budget. (this is key to keeping a client happy)
*spline is a term used to describe the 2D framing of an object. Wireframes are usually added to these frames to begin the detailing process.
NOTE 2: Since the Computer Added Design (CAD) used the same extrusion points it allowed for ease of texturing and lighting.
NOTE 3:
Color shader: Once a color is selected and set it will be affected by lighting.
Luminence shader: Selecting and placed it will generated its own “lighting” and ignore all external lighting.
NOTE 4: Ambient Inclusion calculates the objects shadows by all natural parameters distance Point of View (POV) of viewer.
